Create the API User
- Within your HaloPSA application navigate to Configuration -> Integrations -> HaloPSA API
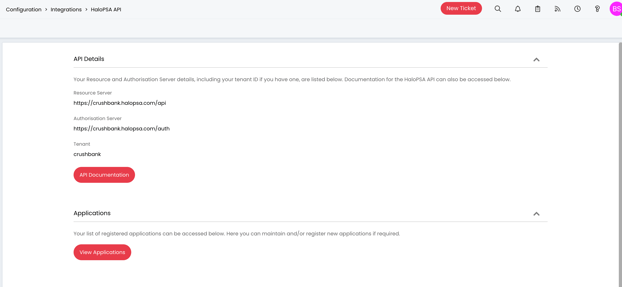
- Write down the following as you will need to pass it to CrushBank to setup the integration.
- Resource Server
- Authorization Server
- Tenant
- Write down the following as you will need to pass it to CrushBank to setup the integration.
- Click on the View Applications button.
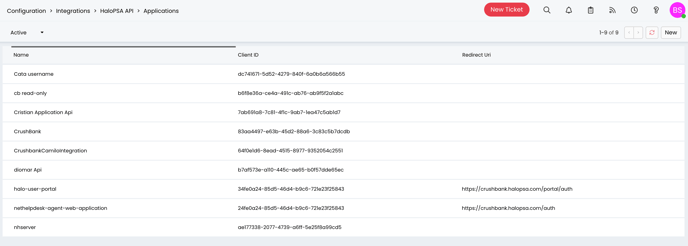
- Click the New button on the upper right to create a new application.
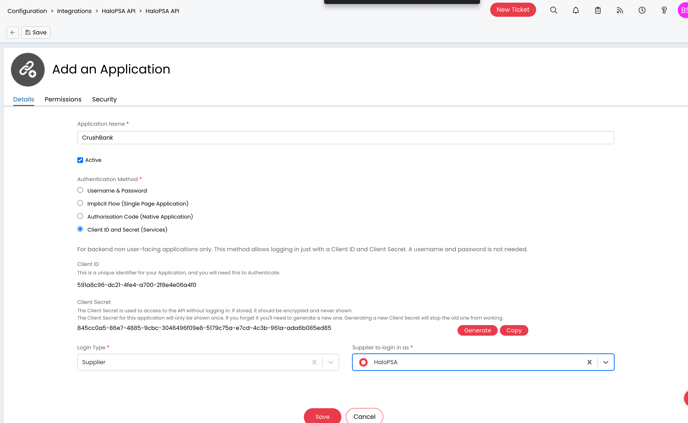
- Give the Application a name. eg. CrushBank
- Select Client ID and Secret as the Authentication Method
- Make sure to note your Client ID and Secret as you will need to provide CrushBank with it.
- Select a login type:
- Agent
- Agent to login as: (Select any agent that has access to read Tickets, Ticket Types, and Assets, and KBAs)
- Also make sure the agent to login as Can View Unassigned Tickets and Can view Tickets that are assigned to other agents.

- Agent
- Click on the permissions tab
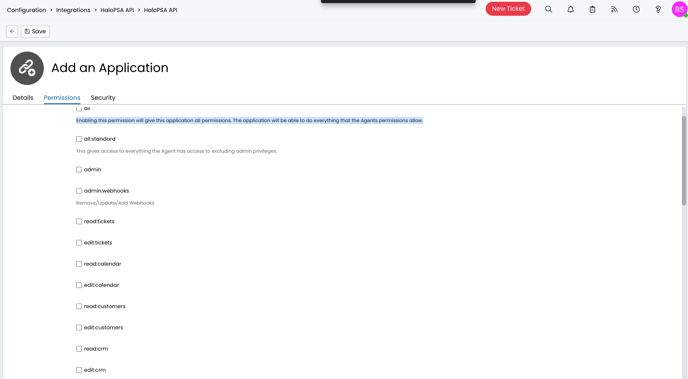
- At minimum, you will need the following permissions:
- read:tickets
- read:crm
- read:items
- read:timesheets
- read:kb
- read:assets
- At minimum, you will need the following permissions:
- Save the new Application.
- Send the following to support@crushbank.com or the onboarding team member you are working with.
- Resource Server
- Authorization Server
- Tenant
- Client ID
- Client Secret