- Client must have ESN enabled with ECI along with database access. If you don't have ESN and / or database access enabled, please reach out to ECI account manager to get this setup.
- You will also need to reach out to your ECI account manager to get your CrushBank Account ID setup for the API. Please reach out to your CrushBank onboarding team member you are working with get your new account id.
- Once the Account ID is setup on the E-automate side, CrushBank will setup your connection and data from E-Automate will start to get ingested into your CrushBank system.
- Integration only pulls last two weeks of data so if you want to import historical data, please follow the steps below.
Importing Historical Data
After setting up your EAutomate connection in CrushBank, follow the steps below to get your historical service data older than 2 weeks into CrushBank.
Please wait until the API is setup to begin this part so we don't miss any data being ingested.
- Download EAutomateSeviceHistory.sql
- At the top of the file, you will see the following code. Change the number -3 to however many years you want to go back. Default is 3.
- set @seedDate=dateadd(year,-3,getdate())
- Run the query against your EAutomate database to retrieve the historical data (two grids of data will return).
- Export the first grid of data into a .csv file and call it ServiceHistory.csv
- Then export the second grid and call it Parts.csv
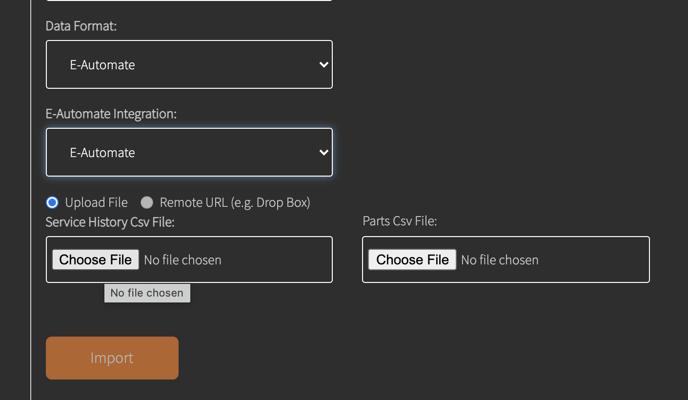
- Login to CrushBank as an admin and go to Admin -> Data Import. (please reach out to the CrushBank Onboarding Team if you don't have access)
- For Date Format field, select E-Automate.
- For E-Automate integration field, select the E-Automate integration you will be searching against.
- For ServiceHistoryFile.csv, upload the csv file from steps 4 above.
- For the PartsCsvFile, upload the csv file from step 5 above.
- Click the import button.
Eautomate Desktop Client Integration
Starting with E-Automate version 23.0, you can query CrushBank directly from a service ticket within E-Auto.
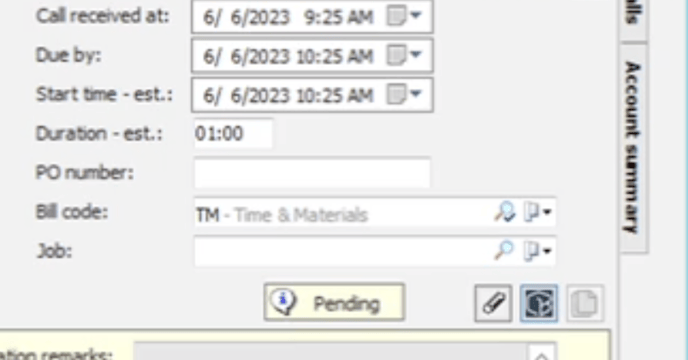
Clicking the CrushBank icon above will automatically query CrushBank using the problem description and the model on the work order.
In order to activate the CrushBank functionality in 23.0, you must do the following:
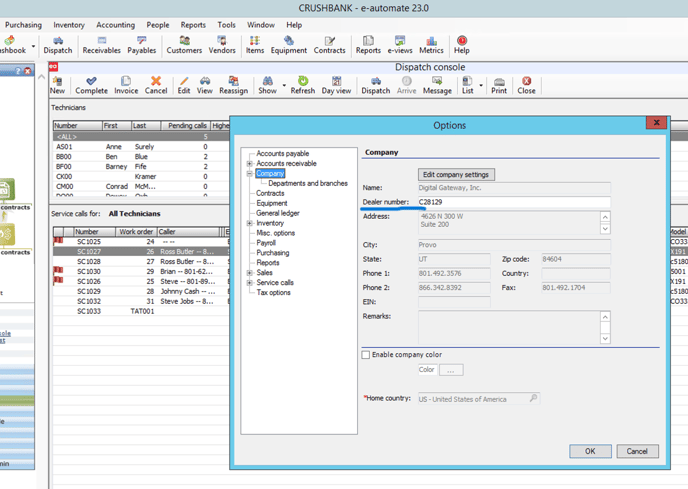
- Enter your Dealer ID in Eauto: Eauto menu> select tools> options> company> then populate the Dealer ID on the right side