Configure Crushbank into ServiceNow
Explains how to embed CrushBank functionality into ServiceNow.
ServiceNow offers multiple ways to integrate CrushBank functionality within its portal depending on the functionality you are using within ServiceNow. Each section below will explain the steps based on how you are using service now.
Service Desk
- Create the UI Macro for the iFrame.
- In the navigator within ServiceNow, search for UI Macros. It will bring up System UI - UI Macros. Click on this link.
- Click the New button to create a new macro.
- Give the macro a name. (eg. Crushbank)
- In the xml section, provide the following:
- You will want to modify the source parameter in the url below depending on the entity you are trying to pull back as follows:
- Incidents - source=incident
- Cases - source=case
- Tasks - source=casetask
- Accounts - source=account
-
<?xml version = "1.0" encoding = "utf-8" ?>
<j:jelly trim="false" xmlns:j="jelly:core" xmlns:g="glide" xmlns:j2="null" xmlns:g2="null">
<tr>
<td colspan="2">
<iframe width="660px" height="500px" src="https://connectwise.crushbank.com/askme/search?op=pod&ticketId=$[current.number]&integrationId=3dcbca1a-d541-4e3e-9a5e-0982423c0b06&source=incident" style="border:1px solid #0A95E1"/>
</td>
</tr>
</j:jelly> 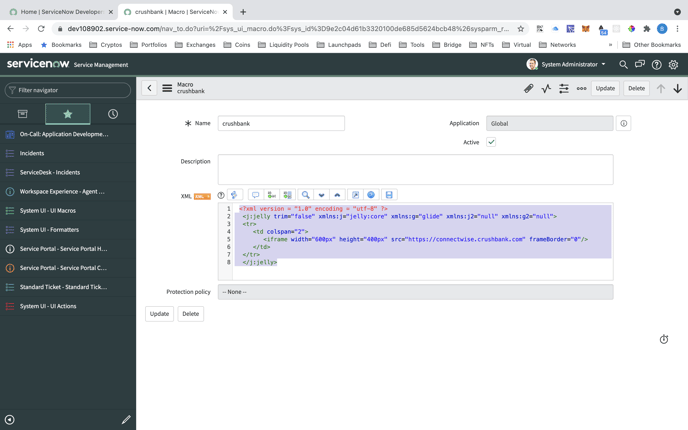
- Save your changes.
- You will want to modify the source parameter in the url below depending on the entity you are trying to pull back as follows:
- Create the UI Formatter.
- In the navigator, search for Formatters. This will return System UI - Formatters. Click on this link.
- Click the New button to create a new formatter. You will need to create a formatter for each System Macro that you want to create. (eg. 1 for incidents, 1 for cases, 1 for tasks)
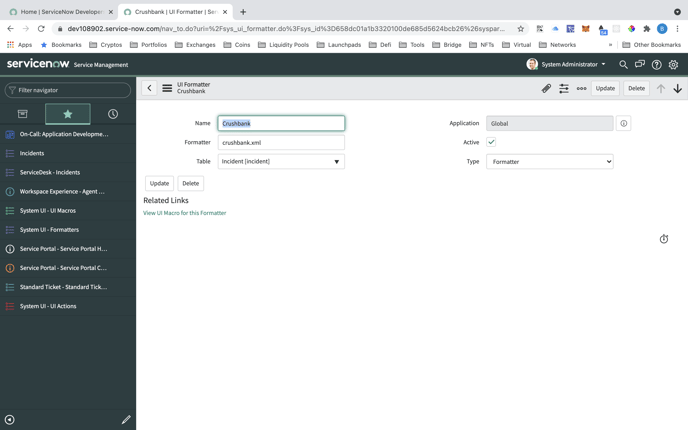
- Give the formatter a name. (eg. crushbank)
- In the Formatter field, put the name of the UI Macro you created in step 1 above followed by ".xml" - eg. Crushbank.xml
- For table, select Incident [incident]
- Save and close.
- Customize the form layout for incidents to include the UI Formatter you just created.
- In the navigator pane, search incidents. This will bring up Service Desk - Incidents. Click on the link.
- Click on the menu item at the top and select Configure - Form Layout
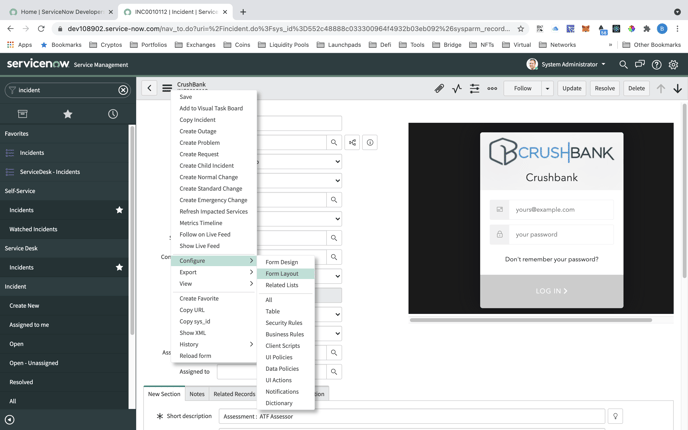
- Decide which section you want to embed the Crushbank UI Formatter. Move the Crushbank formatter you created in Step 2 into the available section.
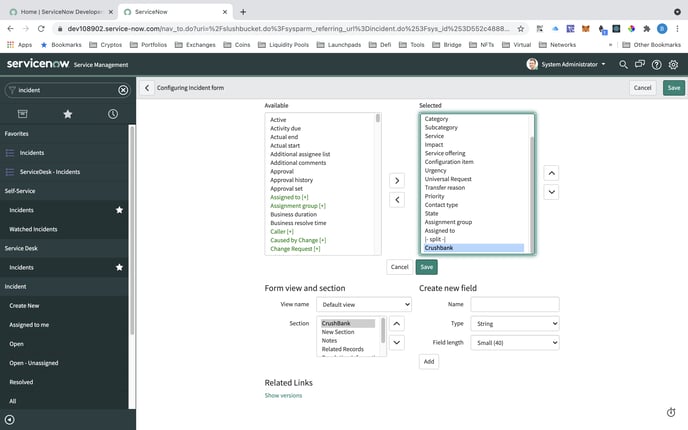
- Click Save.
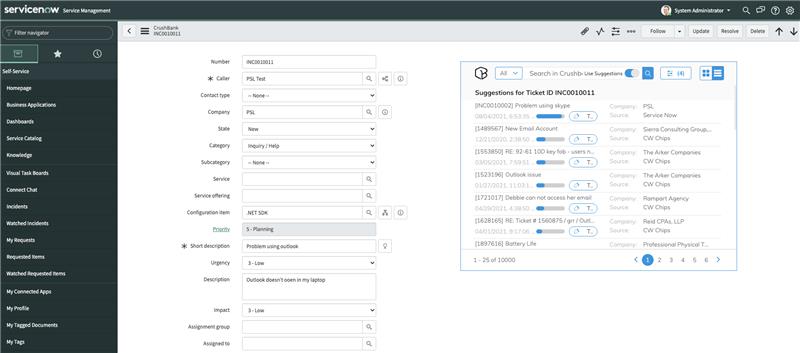
- You will then be redirected to the incident edit page where you can see Crushbank embedded within the page.
Service Portal
- In the Navigator Pane, search for Service Portal. Click the link that says Service Portal - Service Portal Configuration. This will open a new tab with options to configure your service portal.
- Click the option for Widget Editor
- Click the link to create a new widget.
- Provide a widget name and id and click Submit.
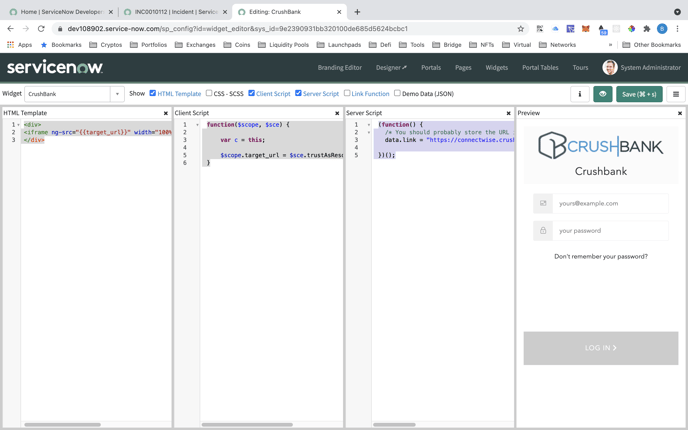
- Add the following code to each section.
- HTML Template
-
<div>

<iframe ng-src="" width="100%" height="500px" style="border:none;">

</div>
-
- Client Script
-
function($scope, $sce) {

    var c = this;

    $scope.target_url = $sce.trustAsResourceUrl(c.data.link);

}
-
- Server Script
-
(function() {

var gr = new GlideRecord('incident');

gr.get($sp.getParameter("sys_id"));

data.link = "https://qa.crushbank.com/askme/search?op=pod&ticketId="+ gr.number + "&integrationId=3dcbca1a-d541-4e3e-9a5e-0982423c0b06";

})();
-
- HTML Template
-
- Add the widget to the Standard Ticket Configuration. This controls the page when you click on an incident from the Service Portal.
- In the Navigator for ServiceNow, search Standard Ticket Configuration and click this link.
- Click on incident.
- In the info region, check the Advanced check box. For the info widget, select the one you created above.
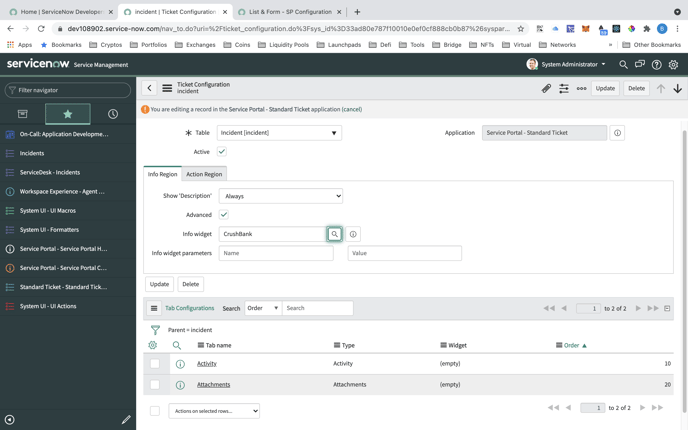
- Click save.
- In the navigator, search for Service Portal Home and click the link. This will open your service portal in a new tab.
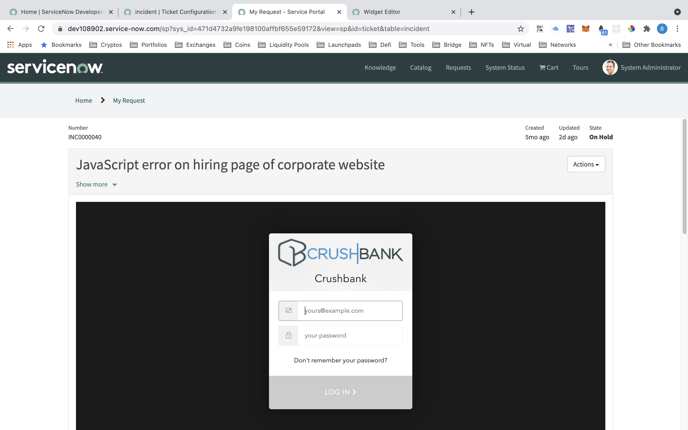
- Click on one of the incidents and you will see CrushBank embedded within the incident.
Agent Workspace
- In the ServiceNow navigator, search for UI Actions and click on the link that called System UI - UI Actions.
- Click on the New button to create a new UI Action.
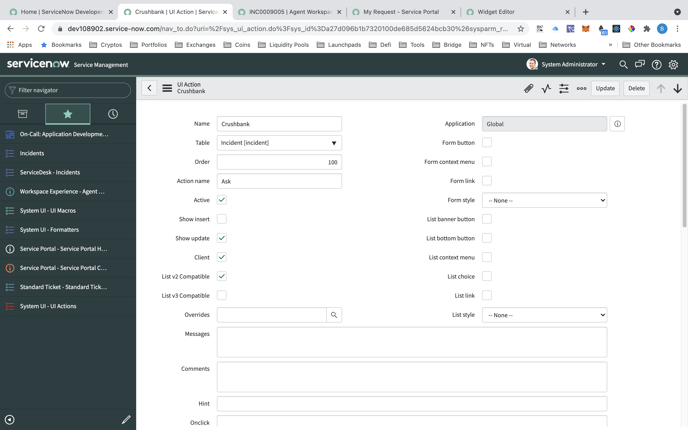
- Give it a name. eg. Crushbank.
- For table field, select Incident [incident] or Case[sn_customerservice] depending on where you intend to embed the UI Action.
- Make sure the following checkboxes are checked.
- Active
- Show update
- Client
- List v2 Compatible
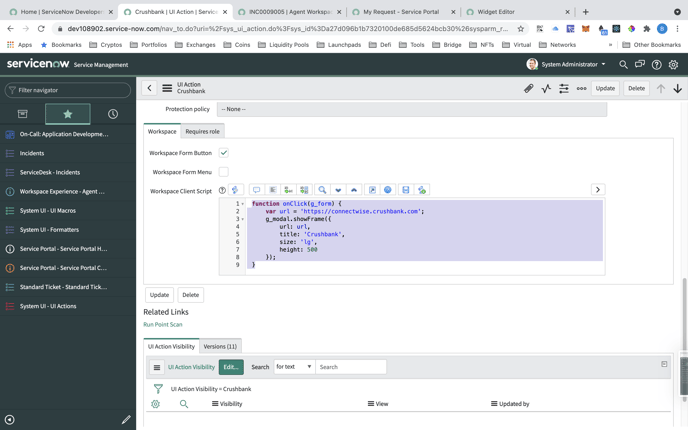
- Scroll down to the workspace tab and add the following in the Workspace Client Script field.
- You will want to modify the source parameter in the url below depending on the entity you are trying to pull back as follows:
- Incidents - source=incident
- Cases - source=case
- Tasks - source=task
- Accounts - source=account
-
function onClick(g_form) {

var url = 'https://connectwise.crushbank.com/askme/search?op=pod&ticketId=' + g_form.getValue('number') + '&integrationId=3dcbca1a-d541-4e3e-9a5e-0982423c0b06&source=incident';

g_modal.showFrame({

url: url,

title: 'Crushbank',

size: 'lg',

height: 400

});

} - The integrationID above in the url will be provided to you and changes for each client.
- You will want to modify the source parameter in the url below depending on the entity you are trying to pull back as follows:
- Click Save.
- In the navigator, search Agent Workspace and click on Workspace Experience - Agent Workspace Home
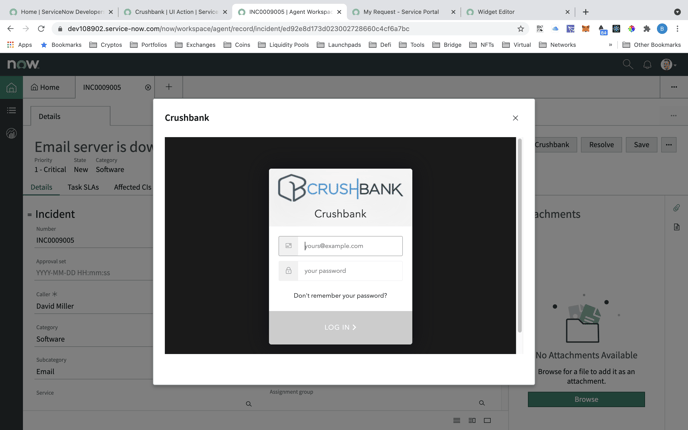
- Open one of the incidents and you will see a button with the same name you gave the UI Action you created.
- Click on that button and a modal box will open up with the CrushBank embedded.
